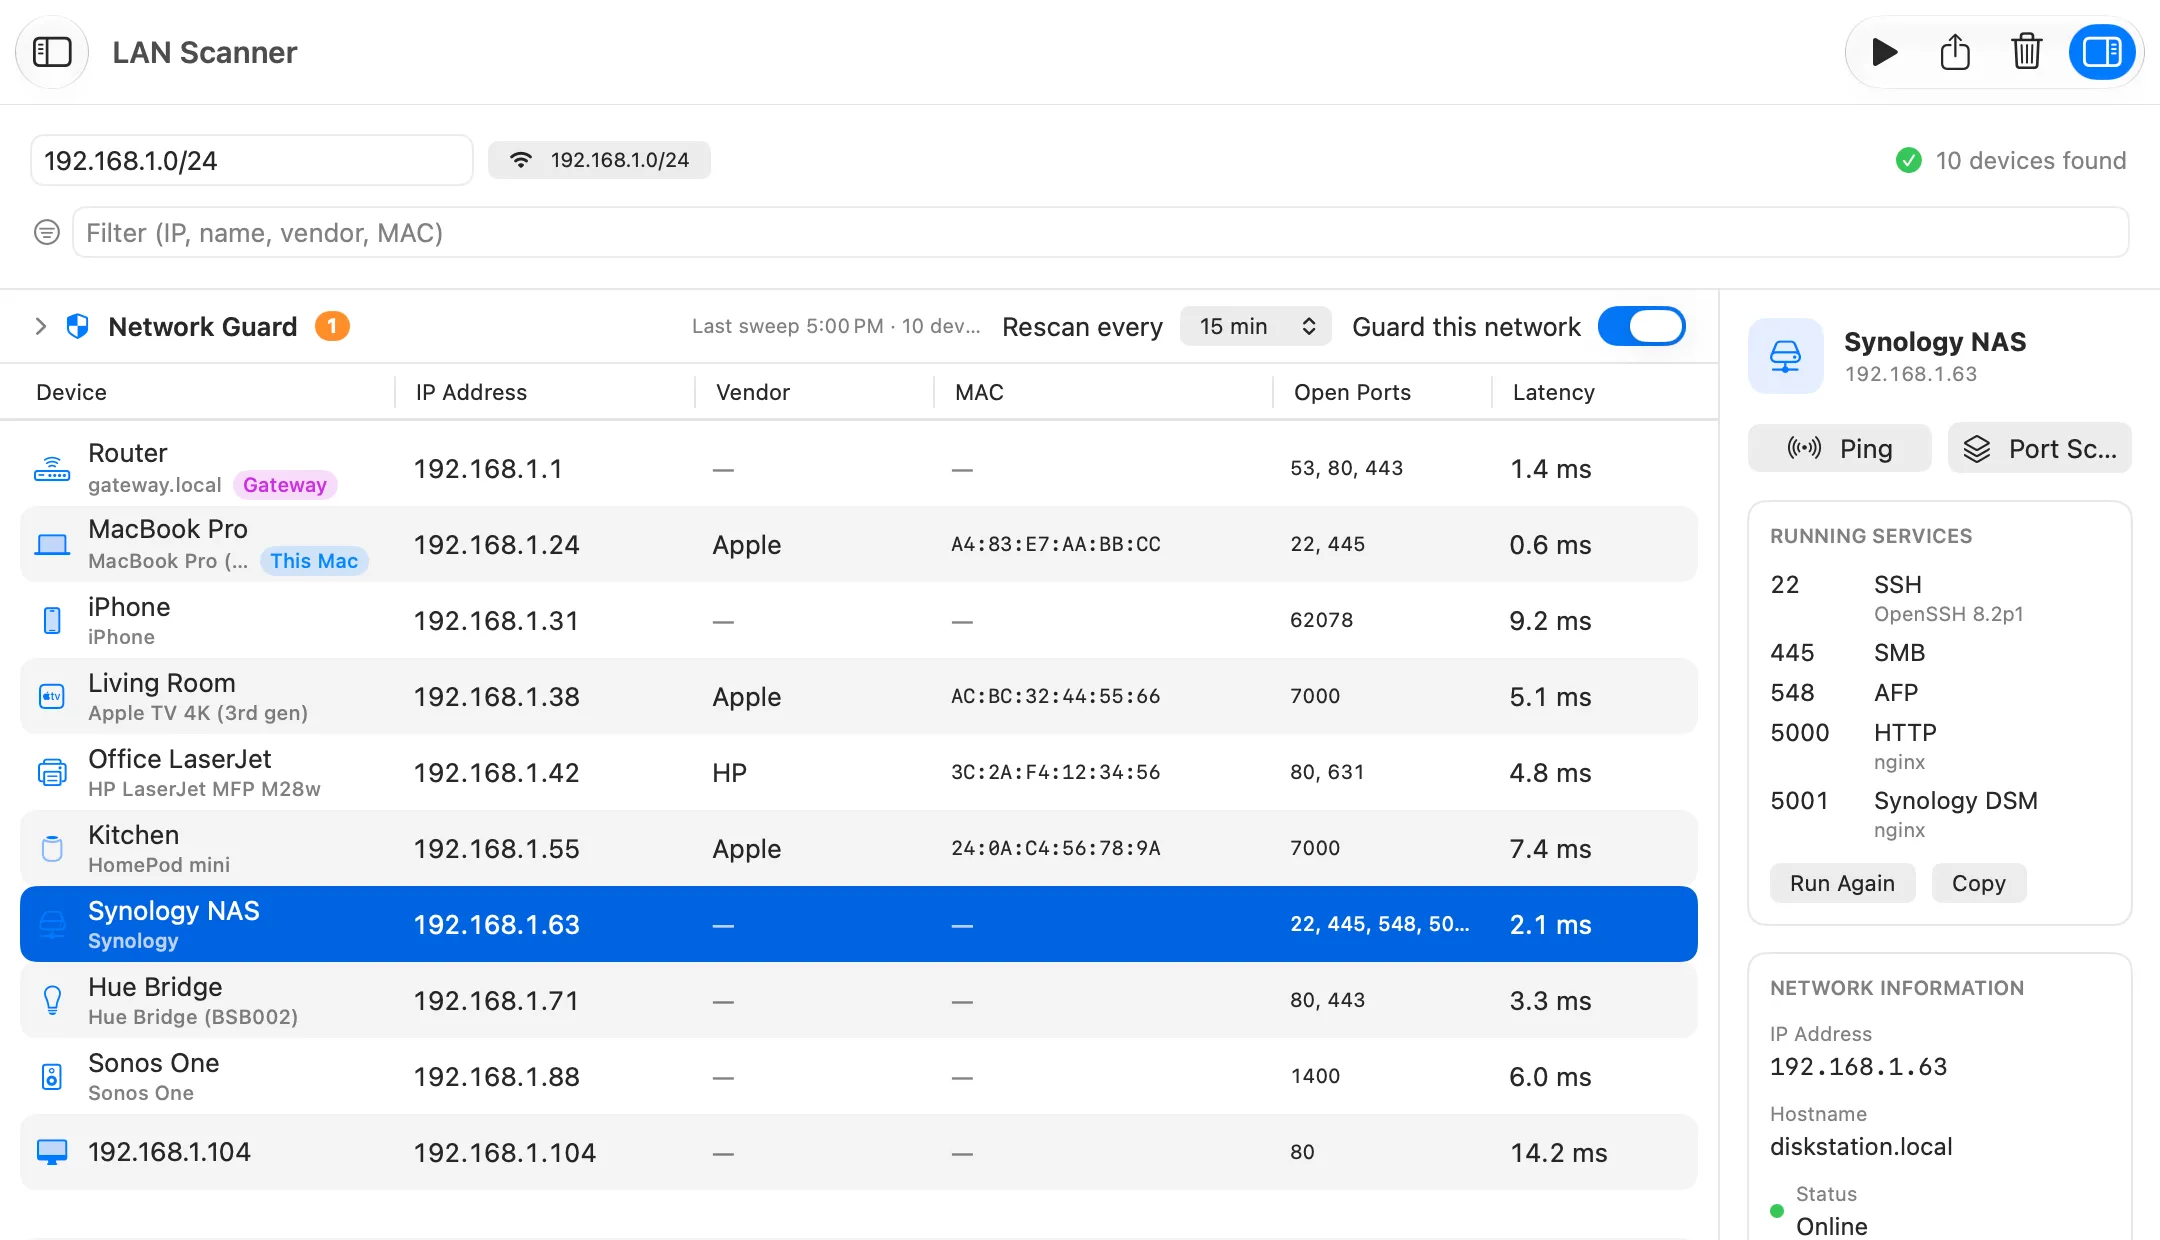
The router’s IP address and the default gateway are the same thing on a home network: the address your Mac sends everything to that is not on the local network. You need it to open the router’s settings page, to ping the router when the internet stalls, or to tell support what you are connected to.
Commands tested on macOS 27.0.1 on 2026-10-20. Addresses and names in the output are replaced.
Find the router’s IP in System Settings
On Wi-Fi
- Choose Apple menu › System Settings, then click Wi-Fi in the sidebar.
- Click Details… next to the network you are connected to.
- Read the Router line. Apple describes it as “The router address for the Wi-Fi connection.”
- The same address is also under TCP/IP, in the same window, next to your Mac’s own IP address and subnet mask.
On Ethernet
- Choose Apple menu › System Settings, then click Network in the sidebar.
- Click your Ethernet network service.
- Click Details…, then TCP/IP. You may need to scroll down.
- Read the Router line.
Find the default gateway in Terminal
Open Terminal (Applications › Utilities). Any of these three commands prints the address.
| Command | What it prints | Best for |
|---|---|---|
route -n get default |
The route the Mac uses now: gateway: and interface: |
The real current gateway, on any connection |
ipconfig getoption en0 router |
Only the address | Scripts |
networksetup -getinfo Wi-Fi |
Address, subnet mask and Router: |
A quick summary of one connection |
route -n get default
route get looks up and displays the route for a destination, and default is the default route. -n prints numbers instead of looking up names.
route -n get default
   route to: default
destination: default
       mask: default
    gateway: 192.168.1.1
  interface: en0
      flags: <UP,GATEWAY,DONE,STATIC,PRCLONING,GLOBAL>
 recvpipe  sendpipe  ssthresh  rtt,msec    rttvar  hopcount      mtu     expire
       0         0         0         0         0         0      1500         0
gateway: is the router. interface: is the connection the traffic leaves through, here en0. To print just the address:
route -n get default | awk '/gateway/ {print $2}'
192.168.1.1
ipconfig getoption en0 router
ipconfig getoption en0 router
192.168.1.1
This prints the router option that DHCP, normally run by the router itself, handed to that interface. It prints nothing for an interface without DHCP: ipconfig getoption en1 router printed nothing on the test Mac, where en1 is a Thunderbolt port.
en0 is Wi-Fi on the test Mac, but check which name your Wi-Fi has before you rely on it:
networksetup -listallhardwareports | grep -A1 "Port: Wi-Fi"
Hardware Port: Wi-Fi
Device: en0
networksetup -getinfo Wi-Fi
networksetup takes the name of a network service, as System Settings shows it, not an interface name:
networksetup -getinfo Wi-Fi
DHCP Configuration
IP address: 192.168.1.23
Subnet mask: 255.255.255.0
Router: 192.168.1.1
Client ID:
IPv6: Automatic
IPv6 IP address: none
IPv6 Router: none
Wi-Fi ID: aa:bb:cc:dd:ee:ff
Router: is the gateway. IP address: is your Mac’s own address on the local network, and a subnet mask of 255.255.255.0 is a /24, the usual home network (subnets and CIDR explains the notation). For a wired connection, run networksetup -listallnetworkservices to see the exact service name, then pass that name in quotes.
Why netstat shows several default routes
netstat -nr | grep default also works, but it lists every default route, not only the one in use. On the test Mac it printed five lines, with no VPN connected:
netstat -nr | grep default
default            192.168.1.1        UGScg                 en0
default                                 fe80::%utun0                            UGcIg               utun0
default                                 fe80::%utun1                            UGcIg               utun1
default                                 fe80::%utun2                            UGcIg               utun2
default                                 fe80::%utun3                            UGcIg               utun3
Only the first line is your router: an IPv4 address on en0. The other four are IPv6 routes on utun tunnel interfaces that macOS had up on the test Mac without any VPN. The I in their flags means “Route is associated with an interface scope”, that is, tied to that one interface. To keep only IPv4:
netstat -nr -f inet | grep default
default 192.168.1.1 UGScg en0
route -n get default avoids the question altogether, because it shows the one route the Mac would actually use.
Open the router’s admin page
- Type the address into your browser’s address bar with
http://in front, such ashttp://192.168.1.1, and press Return. - Sign in with the router’s admin password. Where the first one comes from depends on the maker. TP-Link, for example, says newer models ask you to create an admin password on first login, while older ones use “admin” as both the user name and the password. The label on the router and its manual say what yours uses.
- If you have forgotten a password you set, TP-Link says to reset the router to factory defaults to regain access.
If the page does not open:
- A certificate warning on
https://. TP-Link’s admin page, for one, uses a self-signed certificate, and TP-Link calls the browser’s warning “expected behavior”. Check that the address is your gateway before you click through. - A VPN or proxy is on. TP-Link notes that “An active virtual private network (VPN) or proxy can prevent your browser from reaching the router’s local address.” Turn it off and try again.
- It opens in Safari but not in Chrome or Firefox. Since macOS 15, apps need Local Network permission to reach devices on your network, and Apple’s technote says Safari is exempt. Allow your browser in System Settings › Privacy & Security › Local Network.
- Check from Terminal. Command-line tools run from Terminal do not need that permission either, so this tells you whether the router answers at all:
curl -sI http://192.168.1.1/ | head -1
HTTP/1.0 200 OK
A status line means the router’s web server answered, so look at the browser, its permission or a VPN. No output means nothing answered on that address and port; the same command against an unused port on the test Mac printed nothing.
Behind a VPN
A VPN that sends all your traffic through the tunnel takes over the default route. Apple’s documentation for VPN apps puts it this way: if the default route is included, “the system routes traffic that doesn’t match a specific rule in the system routing table through the VPN.”
So with such a VPN connected, route -n get default no longer leads to your router: its interface: line names the VPN’s tunnel interface (a utun name on a Mac) instead of en0. A split-tunnel VPN, which routes only some networks through the tunnel, leaves the default route on your router.
To see the real router while the VPN is on, ask about the Wi-Fi interface itself rather than the default route:
ipconfig getoption en0 router
networksetup -getinfo Wi-Fi
route -n get -ifscope en0 default
The first two report the router the Wi-Fi connection was given, not the route in use: ipconfig shows the one DHCP handed out, networksetup the one in the connection’s settings. The third asks for en0’s own default route: -ifscope exists because a Mac can hold several default routes, each tied to one interface. On the test Mac, with no VPN connected, all three printed 192.168.1.1. If you are not sure the VPN is carrying your traffic at all, see is my VPN working.
See the gateway live in Netutilus
Network Monitor in Netutilus shows the router’s address without Terminal, and keeps watching the connection while it runs. Network Monitor is free.
- Open Netutilus and choose Network Monitor under Monitoring in the sidebar.
- Click Start.
- Read Gateway: that is your router’s address.
- Under Interface, In use marks the connection carrying your traffic. A VPN tunnel is labelled VPN tunnel.
- Leave it running. Changes logs every switch, drop and return with its time, such as the Mac moving from Wi-Fi to Ethernet.
Copy puts everything on screen, the gateway included, on the clipboard for a support request. Network Monitor reads all of this from the Mac itself and sends nothing over the network. It shows addresses only: it does not open the router’s admin page, and it does not list the other devices on your network.
For that, LAN Scanner, part of Netutilus Pro, lists every device it finds and marks the router with a Gateway badge, as in the picture above. On Wi-Fi, with Location access, it can also name your router from its Wi-Fi access point. Netutilus never reads your location.
Related tasks
- Your Mac’s own address is the
IP address:line innetworksetup -getinfo Wi-Fiabove, or the output ofipconfig getifaddr en0. It is a private address that your router hands out and that means nothing outside your network. Your public address is the one your provider gives the router: find your public IP address on a Mac. IP addresses explains the difference. - Other devices on your network: the router’s own list of clients is one place to look. Who is on my network covers that list, LAN Scanner and what to do about a device you do not recognise. The Terminal ways are in how to see all devices on your network from a Mac.